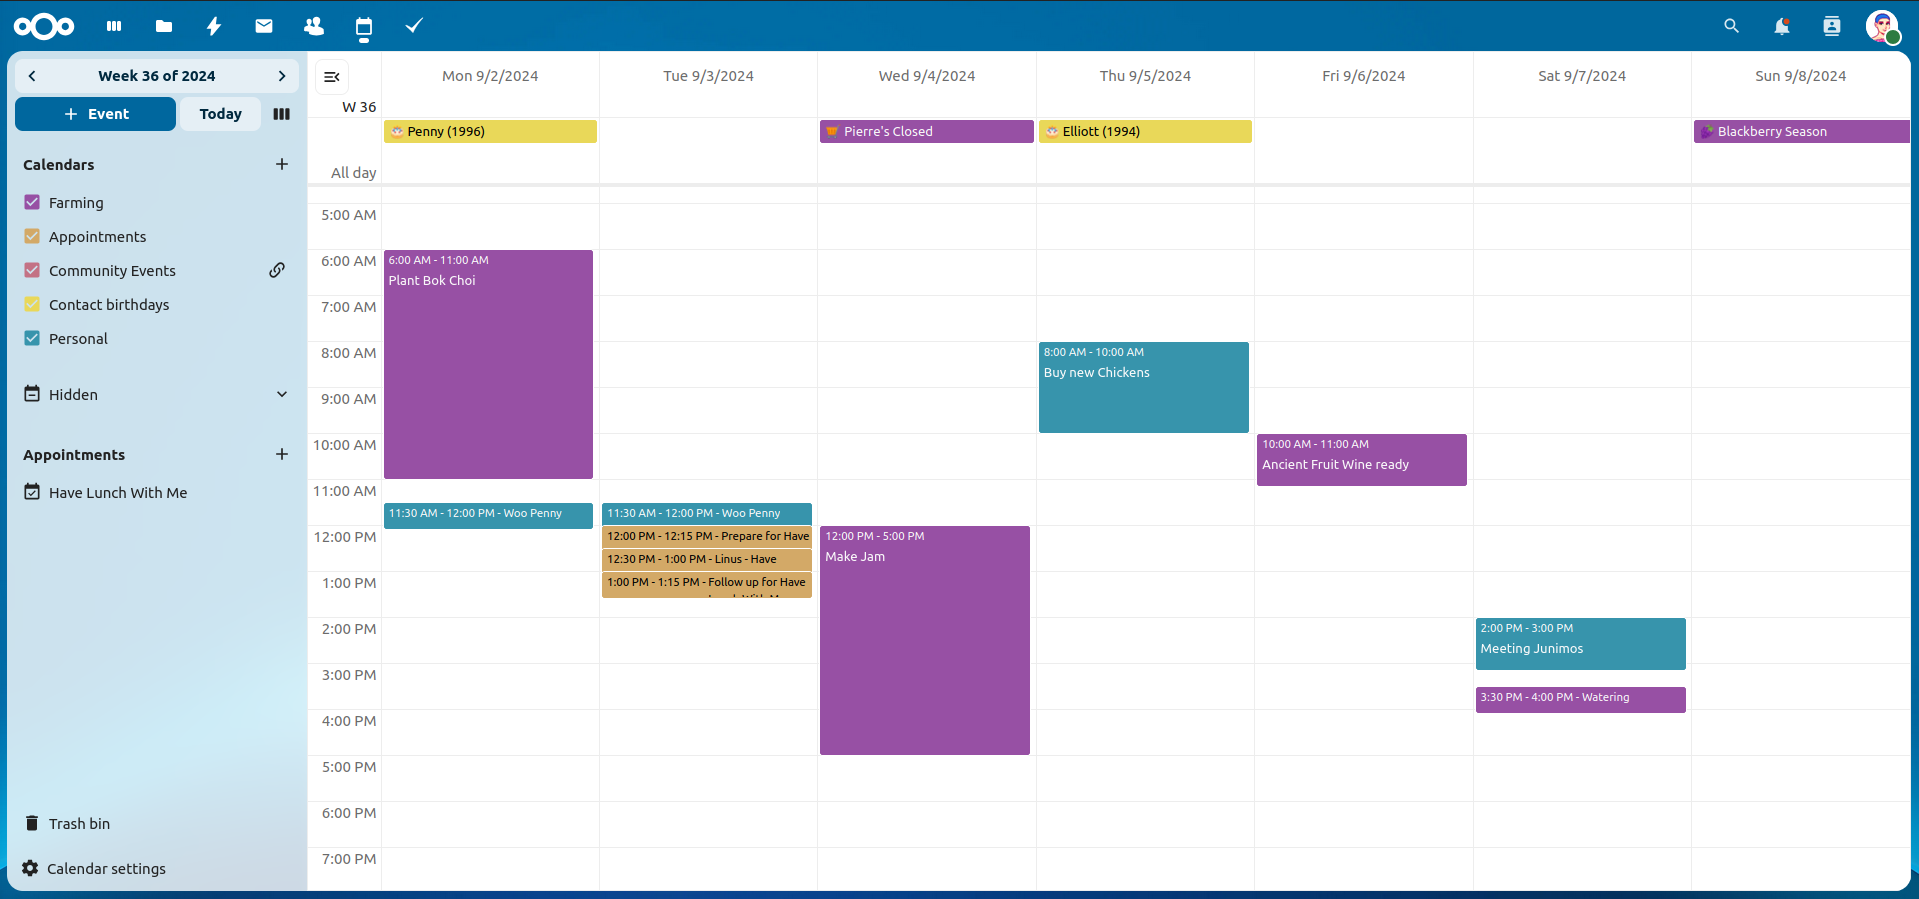
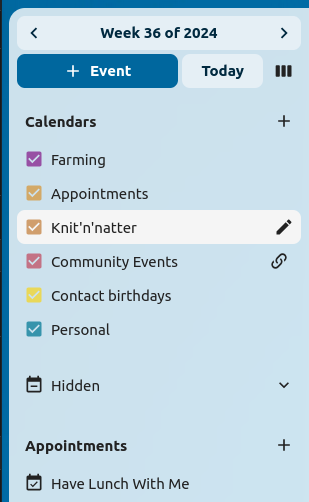
Calendars
Calendars of the HfG cloud allow creating, configure and share a calendar with other people (and allow them to see or to edit them). But they actually allow doing countless other things, some of them you probably don’t know.
The documentation on Nextcloud is a good source and make our job really easier. So, we are copying and editing it (stand: December 2022): that’s the good part of Creative Commons Public License. Let’s first have an overview on the basics:
- Managing calendars: where we explain how to create, share, publish, subscribe, import and export or delete a calendar.
- Managing Events or Meetings: where we explain the difference between an event (only one participant) and a meeting (more participants) and how to create, manage, set up reminders and make them recurring.
- Working with an E-Mail Client: Here we guide you to configure your Thunderbird, Apple Mail or smartphone so that you don’t miss any appointment.
Here are some cool features, of which you had probably though “The HfG should have an app for that”:
- Invitations
- Availability
- Appointments
When you first access the Calendar app, a default first calendar will be created for you with the name: ‘personal’:
Managing your calendars
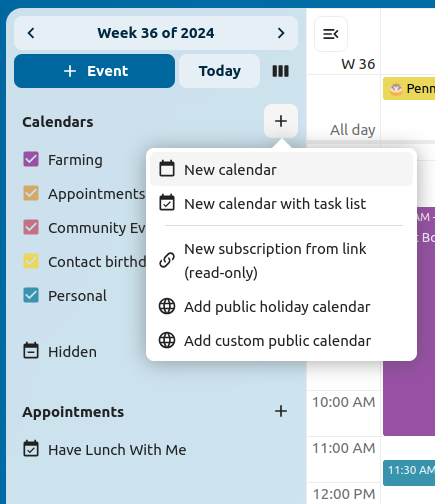
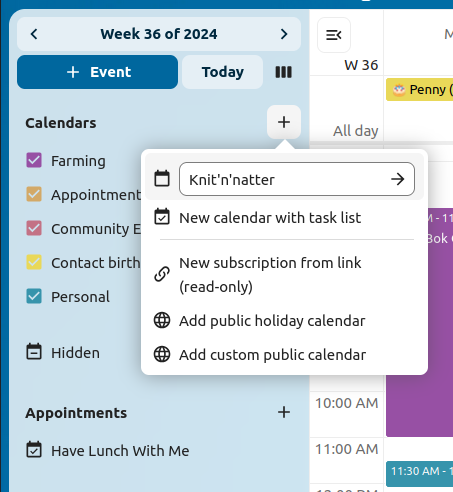
Create a new Calendar
If you intend to set up a new calendar without transferring any old data from your previous calendar, creating a new calendar is the way you should go.
-
Click on
+ New Calendarin the left sidebar. -
Type in a name for your new calendar, e.g., “Work”, “Home” or “Project’s name”.
-
After clicking on the checkmark, your new calendar is created and can be synced across your devices, filled with new events and shared with your friends and circles.
Import a Calendar
If you want to transfer your calendar and their respective events to your Nextcloud instance, importing is the best way to do so.
-
Click on the settings-icon labeled with
Settings & Importat the left-bottom. -
After clicking on
+ Import Calendaryou can select one or more calendar files from your local device to upload. -
The upload can take some time and depends on how big the calendar you import is.
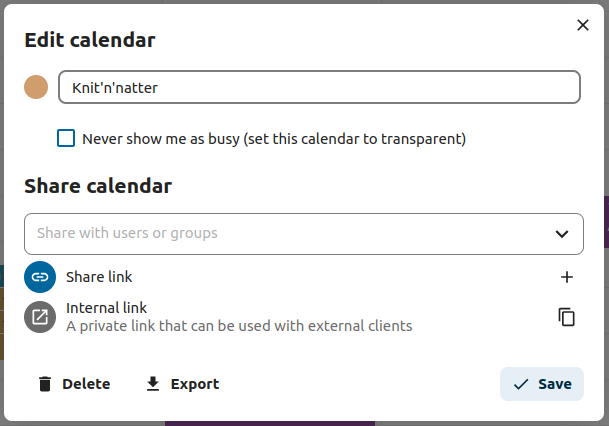
Edit, Export or Delete a Calendar
Occasionally, you may want to change the color or the entire name of a previous imported or created calendar. You may also want to export it to your local hard drive or delete it forever.
Deleting a calendar is a irreversible action. After deletion, there is no way of restoring the calendar unless you have a local backup.
Click on the three-dot-menu of the respective calendar.
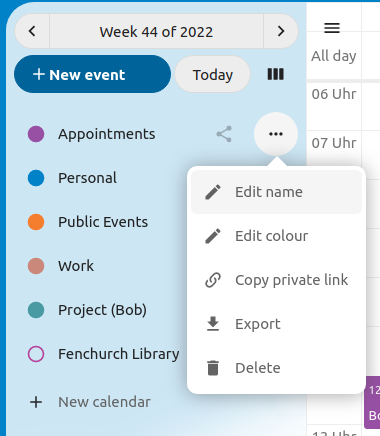
Click on Edit name, Edit color, Export or Delete.
Sharing calendars
You may share your calendar with other users or groups. Calendars may be shared with write access or read-only. When sharing a calendar with write access, users with whom the calendar is shared will be able to create new events into the calendar as well as edit and delete existing ones.
Calendar shares currently cannot be accepted or rejected. If you want to stop having a calendar that someone shared with you, you can click on the 3-dot menu next to the calendar in the calendar list and click on “Unshare from me”. Calendars shared with a group cannot be unshared by individuals.
Publishing a calendar
Calendars can be published through a public link to make them viewable (read-only) to external users. You may create a public link by opening the share menu for a calendar and clicking on ‘+’ next to ‘Share link’. Once created, you can copy the public link to your clipboard or send it through email.
There’s also an ‘embedding code’ that provides an HTML iframe to embed your calendar into public pages.
Subscribe to a Calendar
You can subscribe to iCal calendars directly inside your Nextcloud. By supporting this interoperable standard (RFC 5545) we made Nextcloud calendar compatible to Google Calendar, Apple iCloud and many other calendar-servers you can exchange your calendars with, including subscription links from calendar published on other Nextcloud instances, as described above.
- Click on
+ New Subscriptionin the left sidebar. - Type in or paste the link of the shared calendar you want to subscribe to.
Finished. Your calendar subscriptions will be updated regularly.
Subscriptions are refreshed every week by default. Your administrator may have changed this setting.
Managing Events or Meetings
Create a new event
Events can be created by clicking in the area when the event is scheduled. In the day- and week-view of the calendar, you just click, pull and release your cursor over the area when the event is taking place.
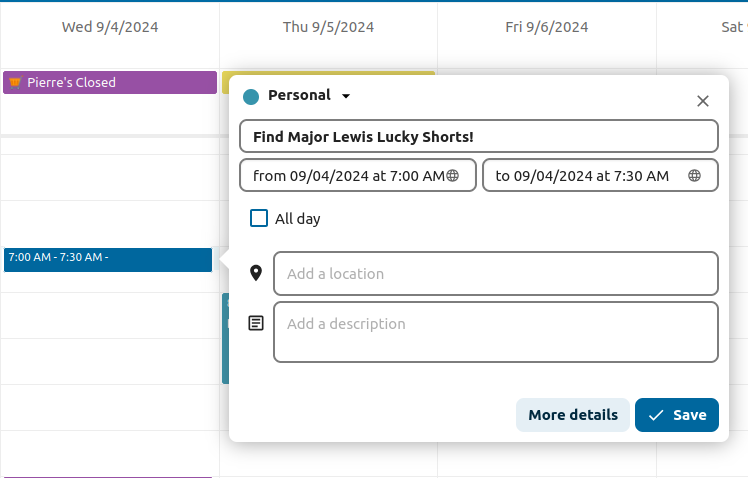
The month-view only requires a single click into the area of the target day.
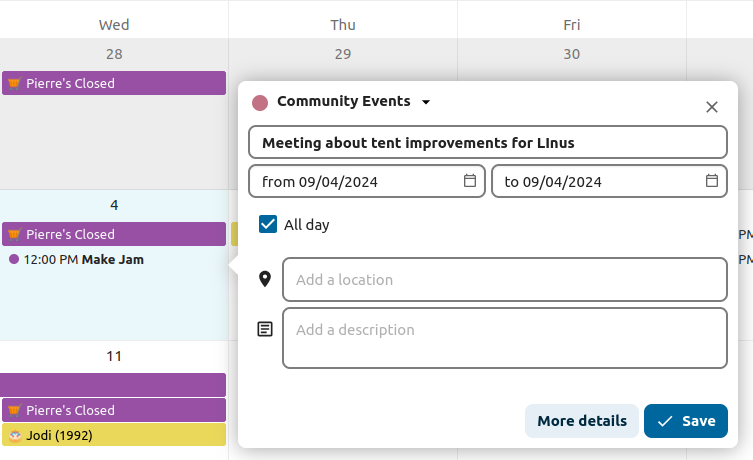
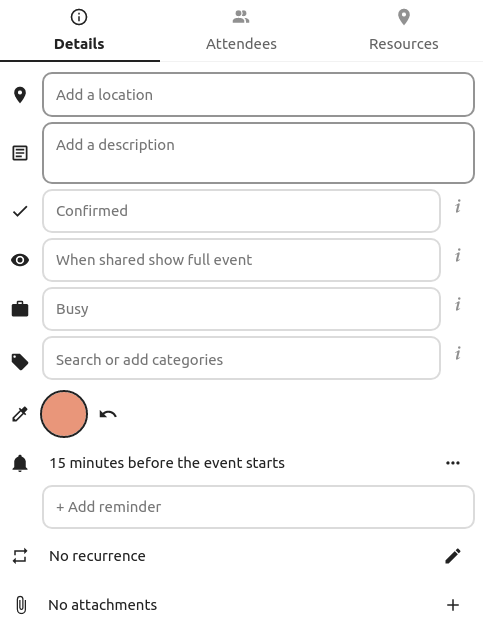
Now, you can type in the event’s name, choose the calendar in which you want to save the event to (e.g., Personal, work), define the time span or set the event as an all-day event. Optionally, you can specify a location and a description.
If you wish to edit advanced details such as the Attendees or Reminders, or if you wish to set the event as a repeating-event, click on the More button to open the advanced
sidebar editor.
If you always want to open the advanced sidebar editor instead of the simple event editor popup, you can set a
Skip simple event editorcheckmark in theSettings & Importsection of the app.
Clicking on the blue Create button will finally create the event.
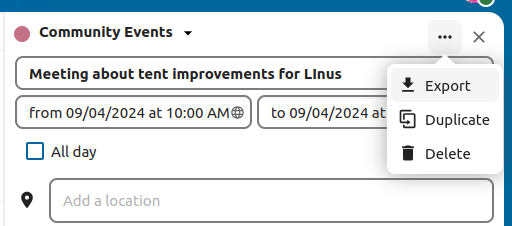
Edit, duplicate or delete an event
If you intend to edit, duplicate or delete a specific event, you first need to click on the event.
Thereafter, you will be able to re-set all event details and open the
advanced sidebar-editor by clicking on More.
Clicking on the Update button will update the event. To cancel your changes, click on the close icon on the top right of the popup or sidebar editor.
If you open the sidebar view and click the three dot menu next to the event name, you have an option to export the event as an .ics file or remove the event from your calendar.
If you delete events, they will go into your
trash bin. You can restore accidentally deleted events there.
You can also export, duplicate or delete an event from the basic editor.

Assign rooms and resources to an event
[This function is not activated in HfG Cloud]
Set up reminders for events
You can set up reminders to be notified before an event occurs. Currently, supported notification methods are:
- Email notifications
- Nextcloud notifications
You may set reminders at a time relative to the event or at a specific date.
Only the calendar owner and people or groups with whom the calendar is shared with write access will get notifications. If you don’t get any notifications but think you should, your Administrator could also have disabled this for your server.
If you synchronize your calendar with mobile devices or other 3rd-party clients, notifications may also show up there.
Add recurring options
An event may be set as “recurring” so that it can happen every day, week, month, or year. Specific rules can be added to set which day of the week the event happens or more complex rules, such as every fourth Wednesday of each month.
You can also tell when the recurrence ends.
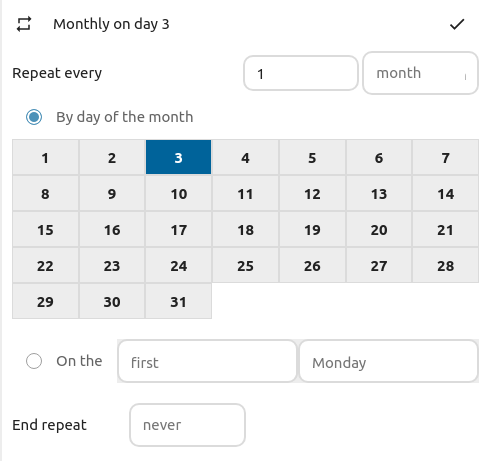
If you edit one of the recurrences of the event, Nextcloud will ask you if you want to edit just this particular one, the future ones (from the one you selected) or all the occurrences (which includes past recurrences).